Installing a cat wall system can provide your feline friend with a space for fun and exercise, but we’ve heard feedback from some people who are concerned they may damage their walls after installing our furniture. This article will guide you through a simple and effective method to repair these damages and restore your walls. This is something that can come in handy when moving from an apartment complex or moving your cat furniture to another location in your home.

Worried about mounting in an apartment?
From our experience, apartments allow small holes in your walls, typically to hang up pictures and other decorations around your home. We send the same size screws along with our furniture for installation, which leaves a small 7mm sized hole after taking down.

If you need approval from your landlord, we suggest explaining that you would like to install shelving that will leave 7mm holes in your wall and that you will be patching them up prior to moving out. If the installation process is not explained, some may think it will leave a large hole in the wall. Installing a TV on the wall uses much larger bolts, requiring bigger holes. If your landlord allows people to install TVs on the wall, the wall-mounted cat furniture should also be fine.
So here are some tips we’ve put together to repair the drywall after removing or switching the location of your wall furniture.
Materials Needed
Before starting, make sure you have the following tools and materials:
- Spackle or joint compound
- Sandpaper (medium and fine grit)
- Filler (suitable for your wall type)
- Putty knife or spackle tool
- Paint matching the original wall color
- Paintbrush or roller
Repair Steps
1. Clean the WallFirst, use a damp cloth to clean the wall, removing dust and debris. Make sure the area is clean and dry.
2. Fill the LoopholesUse a putty knife to apply plaster or filler into the hole, filling it slightly. Allow to dry completely, this usually takes a few hours to a day, depending on the product.
3. Polish the SurfaceAfter the filler is dry, lightly sand the excess with medium-grit sandpaper until it is flush with the wall. Then use fine sandpaper to smooth the surface.
4. Clean the Sanded AreaUse a damp cloth to remove any dust and make sure the walls are clean.
5. Apply Primer (Optional)If there are large areas of damage or color differences, consider applying a primer to help the paint adhere better.
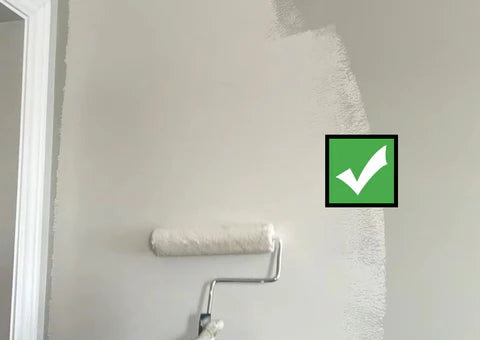
6. Paint the WallUse paint that matches the original wall color and apply evenly with a brush or roller. For best coverage, multiple coats may be necessary, allowing each coat to dry thoroughly before applying the next.

Tips
- Before starting repairs, make sure the room is well ventilated.
- For severe damage or unusual wall materials, professional repairs may be required.
- Make sure the material you buy is suitable for the type of wall and the extent of the damage.
Following these steps will help you effectively repair the wall damage caused by the cat wall system installation, restoring the beauty and integrity of the wall.